So you want to create a personal website for your freelancing business? Hooray!
But errrrmmm…where do you start? You don’t have any tech skills and it’s all just too hard!
Actually, no. Building your own personal webpage is a pretty easy process these days. We taught ourselves so we know you can do it too.
Setting Up Your Personal Website On WordPress
There are many free platforms to choose from such as Blogger, Tumblr or even the free version of WordPress. However, we’re talking about setting up a website that you’re eventually going to attract clients and use as a source of income. So, your website needs to look professional from the get go.
Free platforms are, well, free to use but you don’t get your own domain name and have a number of other limitations. You’re stuck with something like johnsmith.blogspot.com. A bit clumsy looking, no? Also, your website will not be owned by you but will be the property of the site owner (i.e. Blogger, Tumblr etc)
When you choose to go the self-hosted way (i.e. invest a little bit of money in your personal site), you get to have your own domain (e.g. johnsmith.com) and have complete control over it. Win-win.
Why WordPress?
WordPress is the most popular platform for creating a personal website, and not without reason.
- It’s easy to set up and install (we’ll show you how, below)
- You can customize it eleventy billion different ways (keep reading)
- There’s a lot of support (get all your questions answered on forums)
- The content management system is super easy to use (even for newbies)
So, now that we’ve convinced you that self-hosted WordPress is the way to go, let’s get started.
Below we have detailed 3 easy steps to start your personal webpage on WordPress:
- Domain and hosting
- Setting up WordPress
- Website theme and design
Here’s how to create a personal website for your freelancing business in 3 simple steps. Follow the step by step instructions below and get started with that website already!

1. Hosting and Your Domain
Firstly, what is hosting? Hosting is like renting a space on the web where you store all your website’s data, images and files.
For hosting, we recommend Bluehost. With our special discount, you can get plans starting at $2.95 per month.
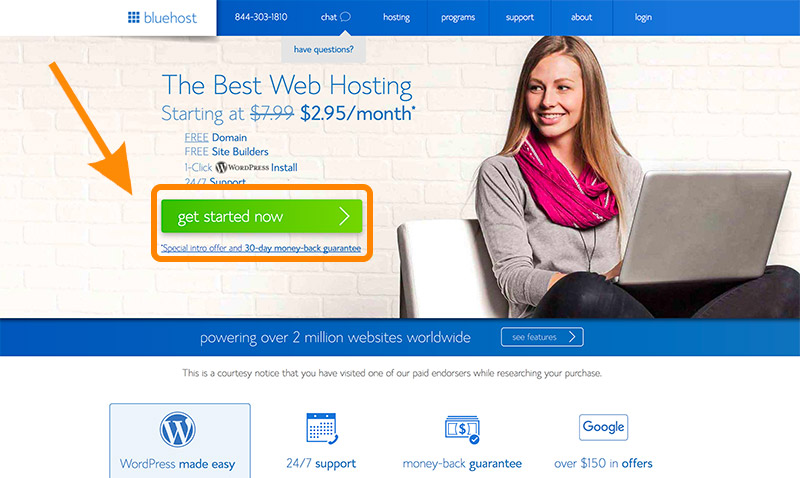
Why Bluehost?
Our recommendation is from personal experience. We use Bluehost to host all of our websites and have never had any issues. They have great customer support and are known to be one of the most reliable hosting companies in the industry. Plus you also get a free domain with a registration of 12 months or greater.
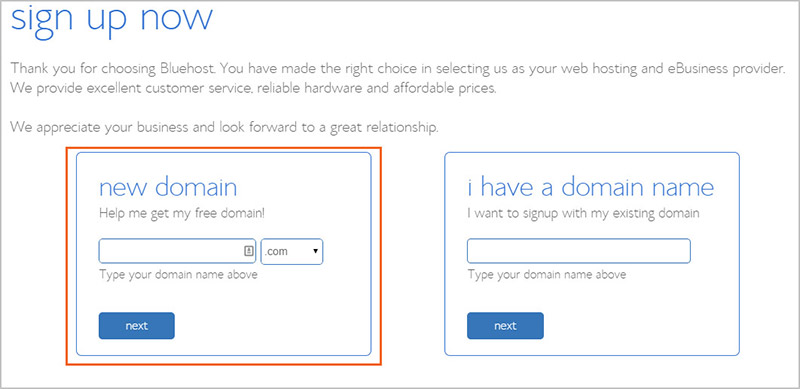
You will be asked to select a plan:
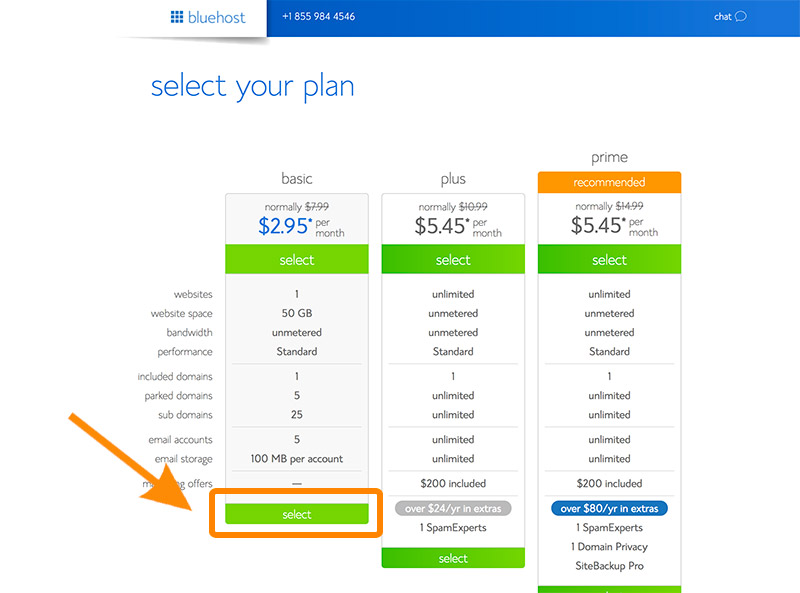
The basic package is all you need unless you plan on having multiple sites, then we recommend the plus plan.
After you have selected your plan, then it’s time to choose your domain.
The good thing about Bluehost is that you get a free domain with your hosting and are not charged any extra for this.
Choosing a Domain Name
Now you get to choose the name of your website.
When making a personal website you should always choose your name. E.g. johnsmith.com
What Extension?.com, .net, .org., .info.?
You should choose .COM domains whenever possible. It is the standard for domain extensions and the one that people assume is attached to your site name at the end.
However, if your personal page is only going to be focused on one market (e.g. you are only targeting clients in the U.K), you can register the name with a country-specific extension e.g. .co.uk.
If the .com is not available then the next best extension is the .net, .org or .info.
However, in our opinion, a better option is to make some changes and add a modifier to the name and find a .com. For example, if you are a designer you could register johnsmithdesign.com.
Now if you don’t have an idea for a domain name just yet, don’t worry, you can select ‘choose later’.
This allows you to continue setting up your hosting. You can come back later and chose a domain name once you have decided.
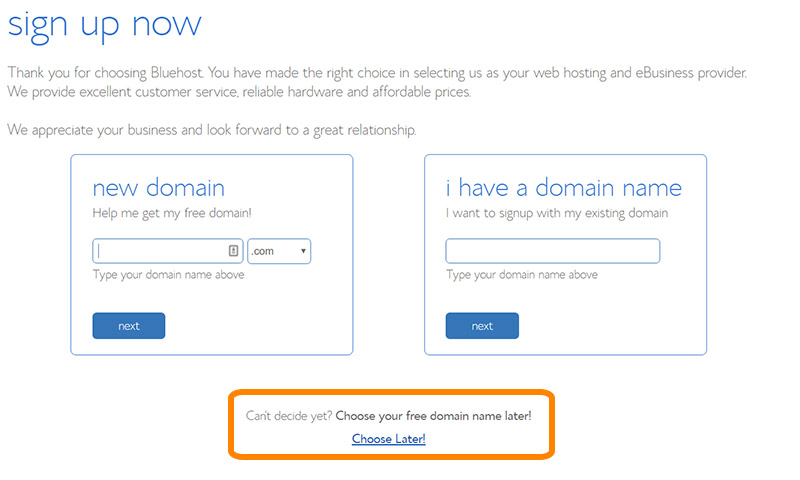
If you have decided on a domain name then you can just go ahead, enter it in and hit ‘next’
Once you have clicked next the payment page will appear.
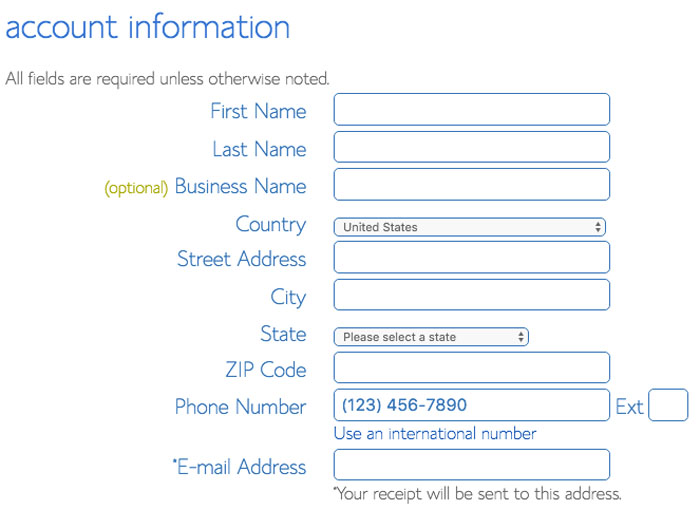
Fill out the information and make sure you include your email address.
In the following section of the page, you will find your plan options.
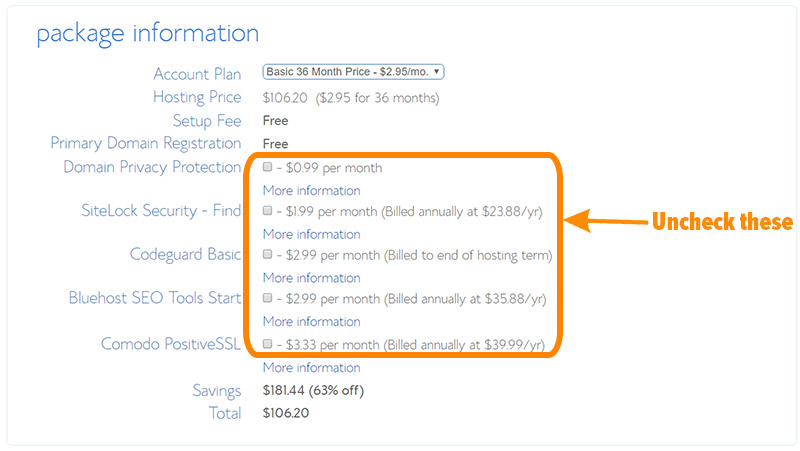
Select the length of the plan. The longer you sign up the cheaper your hosting will be in the long run.
Uncheck all the additional options. These are not needed at this point.
Next, you will need to enter your billing information.
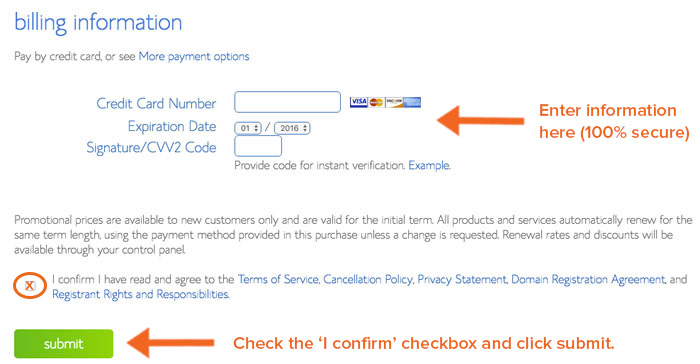
After you have entered your information check the ‘I confirm checkbox and go ahead and click submit.
After your payment has been successful, you will receive an email from Bluehost with all your login details.
2. Setting up WordPress
So the next step to creating your personal website is setting up WordPress.
Bluehost has made it very easy to set up WordPress. So easy that they automatically install it for you. However, there’s still a couple of things that you will need to do.
The first thing is to create a password.
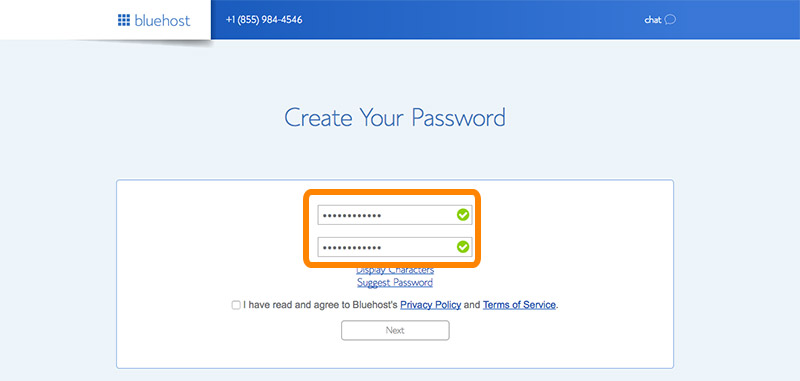
Once you have created your password you can log in. After you have logged in you will see a page similar to this:
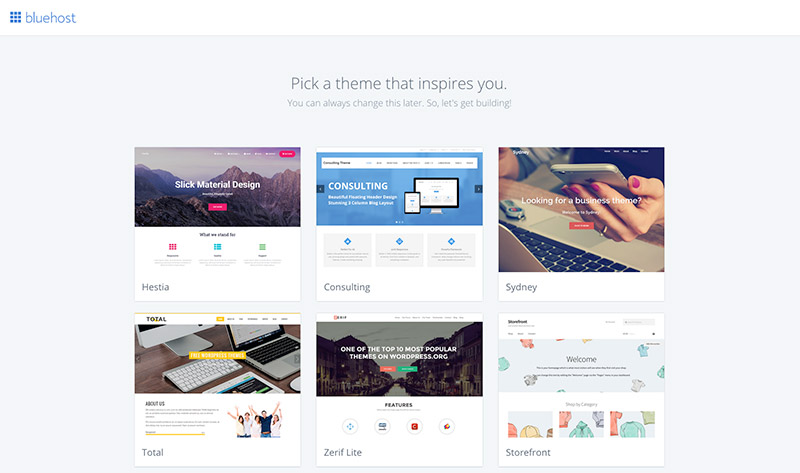
At this point, you want to go ahead and pick a theme. For now, just choose any. You can always change or update your theme. We are going to talk more about themes and customising your website later in this tutorial.
Once your theme has been selected you will be taken to the Bluehost dashboard. AKA the backend of your website.
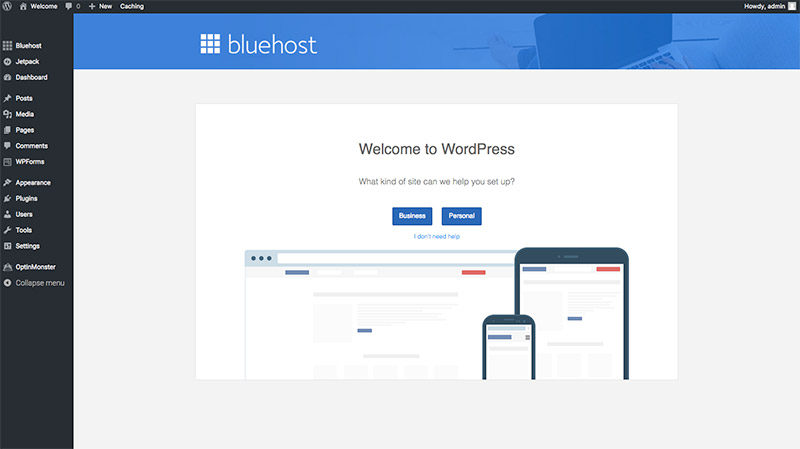
Here you can just go ahead and select ‘business’.
Next, you’re going to be directed to a page that looks like this:
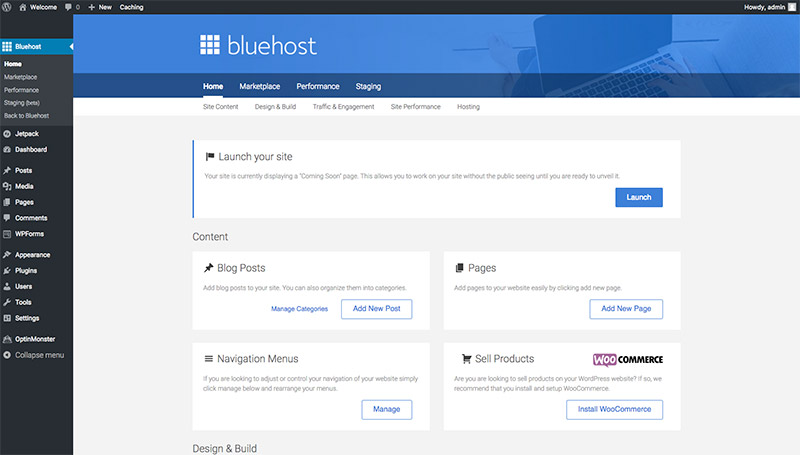
This is where all the fun happens, like getting to design and customise your website.
So to design your personal freelancing site, you will need to install a theme.
3. Installing a Theme
A WordPress theme basically dictates the design and functionality of your website.
You can choose from a bunch of free themes on WordPress here.
You can also browse themes by going to “Appearance” and then “Themes”. Click ‘WordPress.org themes.
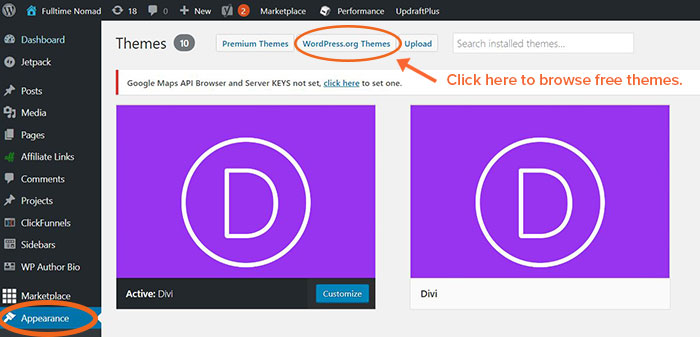
There are 1000s of themes here that you can browse.
If you want to preview one of the themes to see what it would look like on your website, click the ‘Preview’ button.
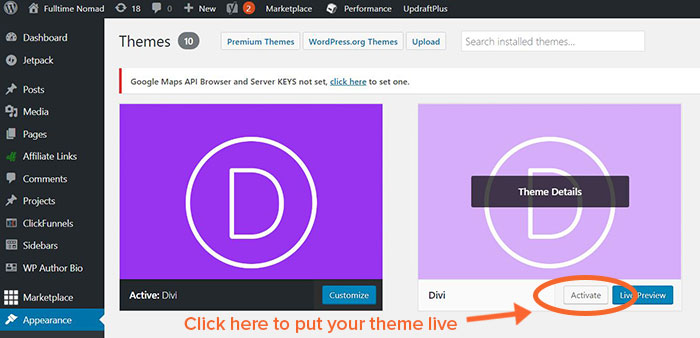
Once you find a theme that you like you can click ‘install’.
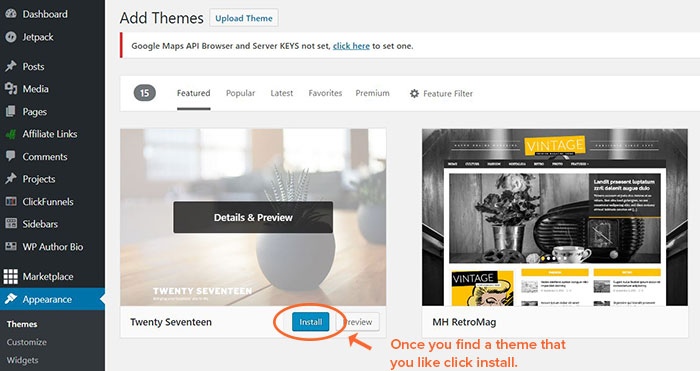
You will then need to click ‘Activate’ to put your theme live.
Free themes are great to start out, however, if you are looking for some premium themes, these are some that we recommend:
- Elegant Themes – If you are looking for a beautifully designed site with all the cool new features, then the Divi theme from elegant is the pick of the bunch. We use this theme on Fulltime Nomad and on a number of our client’s sites. The good thing about Elegant is that you get access to all of their 80+ themes.
- Genesis Studio Press – One of the most popular WordPress themes of all time. Looks great and is very easy to install. We have used this theme on some client sites and really like it.
If you do go with a premium theme, installation is a breeze.
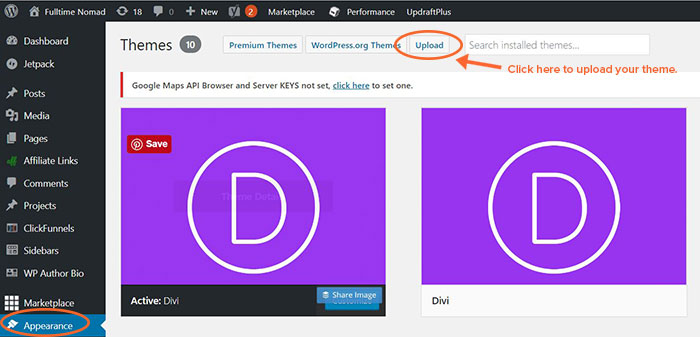
After you have purchased and downloaded the theme go to ‘Appearance’ and then ‘Themes’ and then upload.
Find the downloaded theme .zip file and click ‘Open’.
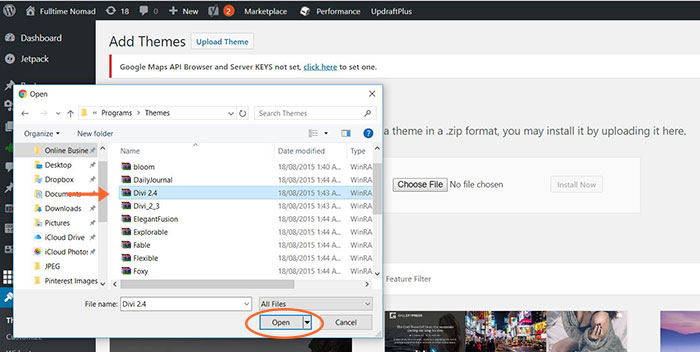
The installation will begin. Once installed go back to themes and find the theme you just installed. Click the “Activate” Button”.
Well done, you’re ready to design your personal website and start attracting clients to your freelance business.
Go check out your live website. Enter your new domain (www.yourblogname.com) into a browser.
If you want to know what exactly you should include on your website so that you can attract high-paying, good quality clients, then check out our article: 10 Essential Elements of a Freelance Portfolio Website.
If you have any issues with the process, let us know. We would be happy to help. You can leave us a comment below, DM us on Twitter or send us a private message via Facebook.
Written by

Johnny H.
As the co-founder of Fulltime Nomad, Johnny really believes the world is too big to stay in once place. In 2013 he broke away from his non-location independent job to chase his passion of travel and living abroad. Now he helps others do the same.


For your freelancing do you get leads via website apart from freelancing websites like upwork. I am a programmer for more than 15 years. dont know how to go about freelancing
Hi Vinoth, we do have an agency website and we recommend freelancers having one too. However, most of our clients have come from Upwork and through referrals from people we know. We believe networking is an important skill to cultivate for freelancers.